Breath of the Wild - Miniboss Guide
Written by Alstar and translated by Sarah
Complete walkthrough • Tips and Tricks
In Breath of the Wild, minibosses are not enemies found roughly halfway through the temples, but they are many that live a bit everywhere in the wild.
Hinox (red, blue and black)
Location: A bit everywhere around Hyrule, mostly near forests and trees
Difficulty: Between 2 and 7/10
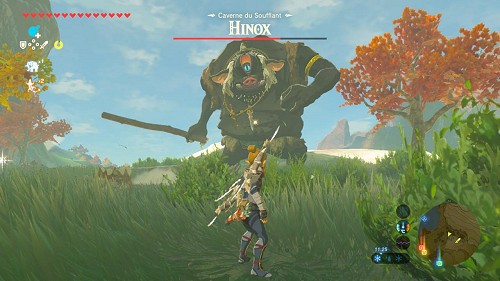
Description: Between the Hinox found in the previous games and those in Breath of the Wild, you immediatly notice the huge height difference. Hinox are gigantic and fat beasts, clad in a simple loincloth and a tree bark vest. The blue ones have some wooden shin-pads and the black ones some metal shin-pads which may block your sword blows. Obviously, as for each incarnation till now, Hinox have a single eye: a huge disgusting opening with pupils opening from left to right. Enough to give you nightmares. Most of them are also wearing a necklace from which hang weapons and, in scarcer occurences, some orbs to use in shrine quests.
Their attacks: Hinox have several attacks depending on their color. The red ones will try to hit you by hitting the ground with their fist, whereas the blue ones can also try to catch you. The black ones, on the other hand, are the most dangerous ones, since they can hit the ground with their open hands several times, thus creating shockwaves that are hard to avoid. If you are very close from a Hinox's legs, be careful, because it will try to stomp you or even to smash you by jumping on you. They can also use nearby trees as clubs or projectiles, or they can even throw rocks at you if you're out of reach.
To defeat them: There isn't a specific method to defeat a Hinox. You just have to avoid its attacks at the last moment before carving your way into it with your weapons. However, there are several tips which can make the fight against those cyclops a lot easier:
- Hinox are always asleep when you meet them. You can't perform surprise attacks on them, but if you're sneaky enough, you can place a few bombs around their bodies to deal a lot of damage before you wake them up.
- During the fight, the Hinox may bend over you with its eye wide open while licking its lips. It's the perfect moment to shoot an arrow at its eye to paralyze it for a few seconds. Still be careful: Hinox are not completly stupid! If you raise the bow again, they'll hide their eye with their hand.
- The pads-wearing Hinox are harder to hit. However, you can get rid of the wooden pads with fire weapons or fire arrows. The strongest Hinox will sometimes wear metal pads which are impossible to take off, but which will give you a strong advantage in case of a storm.
What you have to remember the most with Hinox, is that, despite their hard blows, they are slow. If you want to run away from the fight, do so, it's very unlikely that the Hinox catches up with you.
A note from Stormy: when a Hinox is bending over you, you can pick the weapons hanging from its necklace!
Stalnox
Location: A bit everywhere around Hyrule
Difficulty: 3/10
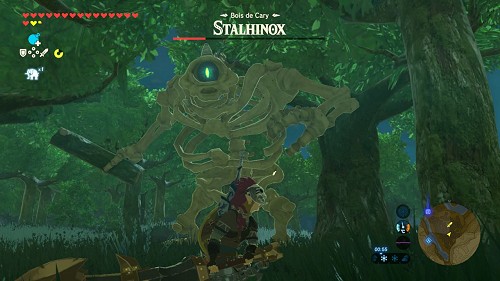
Description: Stalnox look roughly the same as other Hinox would if they didn't have any flesh on their bones. Their eye is darker with a green slit in the middle, which gives them a gloomier look. They have several weapons stuck in their bones, notably great boomerangs and elemental weapons.
Their attacks: Stalnox have the same attacks as the regular Hinox. They hit with their fist, their rear, their legs, and can also take some trees and use them as a weapon or a projectile. They still have a distinction: they can rip off some parts of their own skeleton (ribs, arms and jaws) to throw them at you.
To defeat them: Generally, the "stal" enemies are very easy to kill. However, this one may cause you more trouble. To defeat it, just do the same as you do with the Hinox and attack it with your sword while shooting arrows at its eye. You can attack its skeleton, but if you really want to defeat a Stalnox, you have to destroy its eye. To do so, you can shoot some Bomb, Fire or regular arrows, when its life will be lower to make its eye fall down and hit it. Furthermore, when the skeleton has only a tiny lifebar left, it will be more fragile to the point where its own attacks will make its eye fall down. Hit the eye at this moment and you'll get rid of this colossal undead!
Stone Talus (Igneo Talus, Frost Talus)
Location: A bit everywhere around Hyrule (Death Mountain and Hebra Mountain)
Difficulty: 4/10 (7/10)
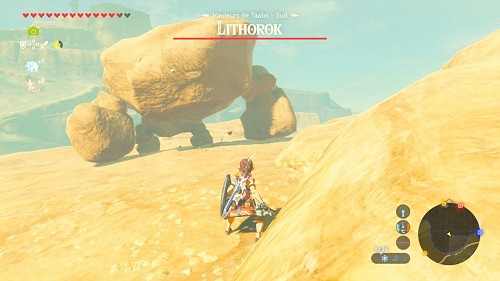
Description: Stone Talus are huge bunch of stones which come together to form a headless golem with little legs and huge arms. They each have a black ore deposit either on their shoulder or their back. Igneo Talus and Frost Talus are rather similar, except from the fact that one is covered in magma and the other in ice.
Their attacks: Stone Talus try to smash you with their fist if you're close, or even to stomp you with their bodies. If you're too far, they hurl their stone fist at you.
To defeat them: As you have surely already guessed, the goal is to destroy the golem by hitting the ore deposit on its body. You still have to reach it, but there are several ways to do so.
- You can climb the Stone Talus from its back to hit the ore deposit with your favourite weapon. After some time, the angry Stone Talus will throw you away from its back, so don't settle there for too long.
- When the Stone Talus tries to stomp you with its body or to get its arm back after hurling it at you, throw a bomb at it to stun it, that way you can climb on its back to hit it.
- You can attack it with some arrows (Bomb ones if you can) as well, but only if you have enough of them. On the other hand, they can stun it for a few moments, if that's what you're aiming for.
About Igneo and Frost Talus, even if the method to defeat them is very similar, the fight will be harder. Igneo Talus will deal damage upon touching them whereas the Frost Talus will freeze you. Also take note that all of their attacks are causing some fire/ice explosions. If you want to climb on them, you'll need some Ice/Fire arrows (Bomb Arrows also work for the Frost Talus) to climb on them without taking damage. Note that they can reform their elemental protection, so don't stay there for too long. If you want a way safer fight, get the three parts of the Flamebreaker/Snowquill armor set and enhance them twice to get the fire/ice immunity to fight them as if they were regular Stone Talus!
Lynel (red-maned, blue-maned, white-maned, silver)
Location: A bit everywhere around Hyrule (in lonely places)
Difficulty: Between 6/10 and 10/10
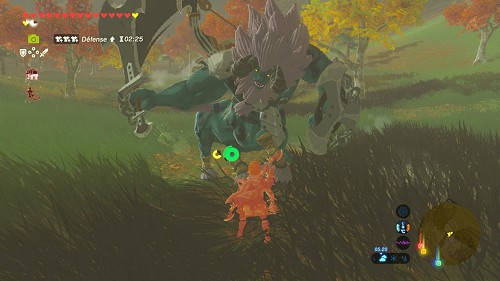
Description: Lynels are considered as the strongest enemies of the whole game. To put it simply, they are creatures with a horse body and a muscular chest, topped with a horned lion head. They're wearing on their back a fighting attire made of a sharp-designed bow as well as a close combat weapon (either a spear, a broadsword, or a sword/shield combo).
Their attacks: Lynels have very various attacks. If you're far away, they can shoot elemental arrows or even make them rain down from above. In close combat, they can throw fireballs, crouch to rush at you with their six limbs or take some momentum to hit with their weapon. The spear-wielding ones can also perfom some "jumping attacks", whereas the sword ones have more choice. They can deal three blows in a row and rush at you to strike you with their blade. The sword and shield wielders will also try to slash you with the shield's sharp edges and the broadsword-wielders can also perform spin attacks. The most powerful Lynels can also roar before thrusting their weapons into the ground to generate an explosion, which will make you lose a good dozen of hearts.
To defeat them: Lynels have insane amounts of life points (between 2000 and 5000) and they HURT, A, LOT. If you start the fight without having lots of weapons or food, you'd better give up. There are still some tips to make this huge task a bit easier:
- If you manage to sneak behind a Lynel without getting spotted, you can climb on it by pressing A. Then, on its back, you can press Y repeteadly to hit the Lynel a lot. Note that this method doesn't use the weapon you're wearing, so don't hesitate to take out your most powerful weapon!
- As for any enemy, Lynels' head is more sensitive and allows you to deal more damage with the bow. Furthermore, hitting a Lynel's head stuns it as well and even allows you to climb on its back to attack it (also works with Urbosa's Fury).
- To fight Lynels, I strongly advise you to use a weapon with a shield to have a better defense. However, the shield can't block all attacks, especially the ones from broadswords-wielding Lynels.
- The back dodges can prove themselves useful, but if you feel braver, you can try to parry the attacks with the shield blows. With a good timing, it's possible to block all attacks from Lynels (except the fireballs) and even to unsettle them for a little while, long enough to shoot an arrow straight at their face.
One last thing: Lynels have the strange ability to warp! As a matter of fact, either to go back to the fight zone or even to follow you, Lynels are very hard to outdistance, so stay alert!
Molduga
Location: Gerudo Desert
Difficulty: 6/10
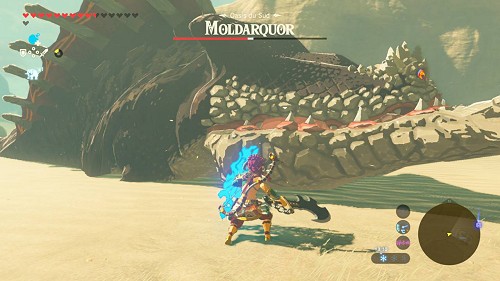
Description: Moldugas are hiding under the sand and thus look like huge living dunes. But as soon as they emerge from the ground, they look like half-whale half-crocodile beasts. Their back sporting a long row of fins is brown whereas their stomach is beige. Despite having teeny-tiny legs, you'd better be careful with their ugly face. Apart from the blowhole and the bulging eyes, Moldugas have a lower jaw similar to stone twice as long as their upper jaw, making it easier to eat whatever comes their way.
Their attacks: Moldugas have only one attack: rushing at you while jumping out of the sand. This attack is the most predictable thing ever, but Moldugas are very fast and especially very strong, so there's nothing to laugh about...
To defeat them: I strongly advise you not to fight any Molduga before having a good armor and enough hearts to at least avoid to get defeated in one hit. Oh, and also, bring a lot of food.
The method to defeat a Molduga is way easier than you would think. This monster is able to find you from very far away when you're walking on sand. If it detects you, a question mark appears on the beast and it will rush in your direction. So place a Bomb (preferably a square one) between you and the Molduga, and, as soon as the question mark changes into an exclamation mark, make the bomb explode to force the creature out of the ground. Hit it a few times and get far before it hits you with its tail. After this first offense, the Molduga will get angry and attack anything on its way. After some time, it will calm down and go back underground, but if the enraged one comes too close to you, you can throw a bomb at it and make it explode on its head before it touches you. Attack it as much as you can and keep it coming out until it loses all its life bar, and voila!
Tip: In the areas where Moldugas are, there are lots of ruins or stone blocks on which you can stand. From there, you just have to throw bombs next to the Molduga to lure it and make it explode when it jumps out to swallow it. This method is safer, but can take longer.
Master Kohga
Location: Yiga Clan Hideout
Difficulty: 2/10
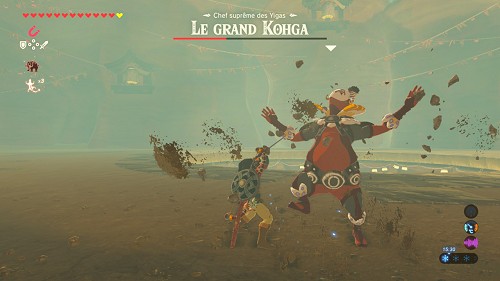
Description: Here he is! The strong! The burly! The one! The only! Master Kohga!!! He's wearing a Yiga Clan traditionnal outfit which poorly hides his curves, but which is adorned with colourful collar and sleeves. He's also wearing a mask to hide his face that you'll unfortunately never see. The fight takes place on a circular field with a bottomless pit in the middle.
His attacks: Master Kohga doesn't come with a great variety of attacks. He mostly tries to send magical rocks at your head. His attacks hurt, but they're very easy to dodge.
To defeat him: When you enter the arena, Kohga appears and pretends you're disrupting his sleep. As soon as he discovers who you are, he introduces himself and starts the fight.
Phase 1: Kohga goes afar and creates an energy screen to protect himself. He summons a magical rock above him before sending it away. When he does that, the screen vanishes thus giving you the opportunity to hit him with a long-range weapon (arrows, bombs, boomerang-like weapons). This causes Kohga to get buried under his own rock. Make use of this moment to give him a few hits until you make him lose a third of his life bar.
Phase 2: Kohga spins around until he stands above the bottomless pit. He doesn't look that happy and now decides to summon two magical rocks that he spins around him before sending them at you. First wait for his screen to vanish and shoot an arrow at him when one of the rocks is above Kohga. The latter will fall on his head and you'll get the opportunity to hit him on the ground. Repeat this until Kohga loses another third of his life bar.
Phase 3: Kohga is now really upset and he summons a giant spiked boulder that he can control from afar. His screen doesn't vanish, which makes your arrows useless. You now have to defy Kohga by using the Magnesis Rune on the huge metal boulder to pierce his defense and deal damages. Then you'll only have to throw twice his own boulder at him and the fight will be over!
After the fight, Kohga, frustrated and exhausted, summons another metal boulder hoping to crush you with it, but the boulder backfires at him and rolls towards the Yiga Master before plummeting him down the bottomless hole for all eternity.

