Twilight Princess - Boss Guide
Originally written by Léviathan and translated by Pureflamme
This guide lists all the bosses you encounter in Twilight Princess. None are insurmountable, but they need a specific technique to be defeated. Of course, read this guide if you are really blocked in the game, be smart, don't ruin your pleasure.
Twilit Parasite: Diababa
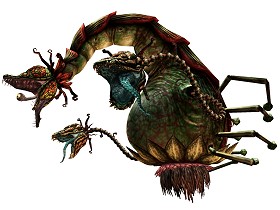
Location: Forest Temple
Difficulty: 3/10
How to defeat it: The Gale Boomerang will be essential.
The first boss is a kind of carnivorous plant. At the beginning of the fight, you will face two buds, whose main attack is to charge you. Use the Boomerang, target at the bombs then target each bud: you will blow them up. After that first step, the boss will appear, this much larger creature squirt acid. At this moment, the monkey that you met before suddenly appears, and this time, he's going to help you. Target the bombs attached to its feet then target the main creature: The explosion brings it down and its weak point is revealed: hit Diababa's eye with vertical strokes to defeat it quickly.
Note from Lucas: Before Diababa squirts poison, you can throw the Boomerang which will stop the process!
Twilit Igniter: Fyrus
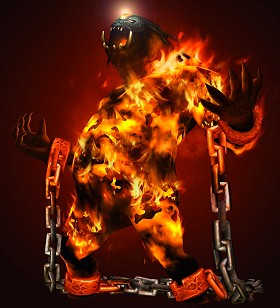
Location: Goron Mines
Difficulty: 4/10
How to defeat it: Blind it then try to bring it down.
This giant creature is quite difficult to defeat, this will be a rather technical fight. First, you have to be precise enough to touch the gem on its forehead with your bow and arrows. When you hit the gem, Fyrus is stunned. At this moment, quickly grab one of its chains, put on your Iron Boots and pull until Fyrus falls. You now have to rush at its head and strike its gem with your sword. Here again, vertical strokes will make a difference.
Repeat this process three times and it will finally die. If you bought the Hylian Shield, you can protect yourself from all its attacks. Otherwise, dodge them or your Wooden Shield will burn.
Twilit Aquatic: Morpheel

Location: Lakebed Temple
Difficulty: 4/10
How to defeat it: The Clawshot is more efficient with Z-targeting!
First step:
Reach the bottom with your Iron Boots. Morpheel appears, your goal is to hit its eye among the tentacles. To do that, you have to attract it with your Clawshot then strike its eye with your sword. Repeat this process some times. If a tentacle catches you, remove your Iron Boots immediately or you will be attracted inside the monster and will suffer of heavy damages.
Second step:
After hitting its eye several times, Morpheel will finally show you its true form, a kind of giant aquatic worm. Remove your Iron Boots and swim near the boss. Position yourself behind Morpheel's head, and cling onto its eye with your Clawshot (don't forget the "Z" button). You will be hooked onto the boss's head and will be able to strike the eye with your sword. Don't stay near its mow or you could be sucked up. Repeat this operation three times to win this fight.
Twilit Fossil: Stallord
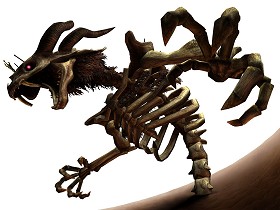
Location: Arbiter's Grounds
Difficulty: 5/10
How to defeat it: Discover the joys of the Spinner!
This boss is not very difficult but you need a very good mastery of your Spinner to defeat Stallord.
First step:
Stallord is a kind of giantic skeleton. For the first part, you must strike its vertebrae with your Spinner and "B" button. Turn around the arena with your Spinner while avoiding the traps, then charge the centre of the room to strike the boss when you are close enough. After doing this once, several creatures will appear to slow you down or to force you to change your direction. Try to dodge them, or if it's not possible, use the "B" button to clear them out. Repeat this operation three times to end this first part, but be aware that there will be more and more creatures on your way.
Second part:
Only the boss's skull is left. Make the central platform go up with your Spinner. The skull will animate and bring you down. Ascend with your Spinner and get closer to the boss who spins around the platform like you. When you are close enough, he starts to throw fireballs. Dodge them by switching rails, and when you are near, charge the skull. When it falls onto the ground, join it and strike it with your sword. If you know the Jump Strike you will get a big advantage. Repeat this operation until the boss is defeated. Don't forget that the more you hurt him, the more there will be traps on the rails.
Twilit Ice Mass: Blizzeta
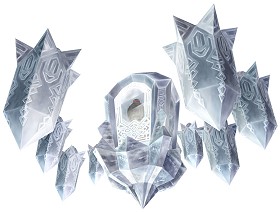
Location: Snowpeak Ruins
Difficulty: 5/10
How to defeat her: You must hit hard to break the ice...
Yeta becomes possessed by the Mirror Shard and transforms into a giant ice creature. For this fight, you only need your Ball and Chain to attack the boss.
First step:
First of all, you must reduce the size of the big ball controlled by Blizzeta with your Ball and Chain. Be careful with rebounds of the ice ball on the walls which can get you. Once you hit the ball enough to destroy it, the second part begins.
Second step:
This part is a little bit more tricky. First, you must avoid every ice pick which will fall on you. Use the glint on the floor to see them and roll. Once all the picks have fallen, turn to them and destroy some with your Ball and Chain. After that, the picks straighten and make a circle around you. Thanks to the glint on the floor, look by which opening you can get out and escape in this direction. Blizzeta will then fall in the centre of the circle. At this moment, turn around and strike her with your Ball and Chain. Repeat this technique three times to win the battle.
Twilit Arachnid: Armogohma
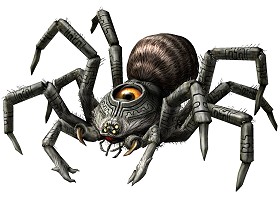
Location: Temple of Time
Difficulty: 3/10
To defeat it: Remember of its weakness in previous opus...
Armogohma hangs on the ceiling of the arena. Look up: it starts moving and lets you see its eye throwing a laser. Take this opportunity to shoot an arrow in the open eye of the spider, which will fall to the ground. Use your Dominion Rod to activate the closest statue and hit the spider with the statue ("B" button). Repeat this operation three times to get it over this big spider.
The boss also sends little spiders each time it gets back to the ceiling: slash them with a great spin to get life or arrows. Once the spider is defeated, its eye is still alive and runs in the room. Destroy it with your Bow and arrows or with your sword to beat Armogohma definitively.
Twilit Dragon: Argorok
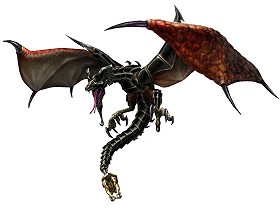
Location: City in the Sky
Difficulty: 6/10
To defeat it: Climb on top of the towers with your Double Clawshot to attack the boss!
This boss can be "easy" if you have a good mastery of the Double Clawshot.
First step:
First of all, you must destroy the boss's armour. Use your Clawshot when the creature swoops to grab its tail, then put on your Iron Boots to bring him down. Repeat this action three times to win this first round.
Second step:
After the dragon left its armour, you must strike the gem located on its back. First, climb on top of the towers using your Clawshot, hook a flying plant, then look at the dragon. When it backs its head and spits fire, cling from plant to plant (using Z-targeting) until you reach its back. If you are not quick enough, he will spin and you'll have to start again. Once you are in the back of the monster, shoot your Clawshot at the gem and strike it with your sword. Repeat this three times and the boss will explode. Note that the third time, the boss will throw fire twice in a row in two different directions, so be careful and immediately change direction to avoid being hit.
Usurper King: Zant
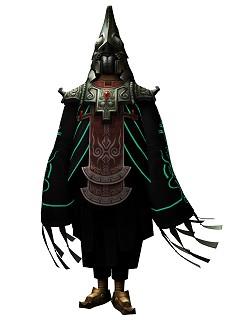
Location: Palace of Twilight
Difficulty: 6/10
How to defeat him: Remember the technique to defeat the boss corresponding to each battle arena.
This fight is made of six steps. It's more long than difficult, and only the last part is complicated if you only know a few Hidden Skills. So, try to keep your life until the last part. Each step takes place in a room you have previously visited, usually in a boss's room.
First step: Forest Temple
Parry his many shots with your shield, and use the Gale Boomerang to bring the boss to you to strike him with your sword. Repeat this operation until the stage changes.
Second step: Goron Mines
You are on a large magnetic plate floating over the lava. Put on your Iron Boots to avoid falling. Zant stands on the flange and shoots at you, protect yourself with your shield. When he stops, take off your Iron Boots, charge him and strike him with your sword.
Third step: Lakebed Temple
This part of the fight takes place under water. Equip your Iron Boots and your Zora Armor. Zant stands under the giant helmet and shoots at you. Protect yourself, then bring him to you with your Clawshot and strike him. At this moment, three other helmets will appear, and Zant is under one of them (four). Find him and repeat the operation.
Fourth step: Forest Temple (Ook's room)
Here you are, back in the arena of the first mini-boss, Ook the monkey. Zant jumps from one post to another until he stops and starts shooting. Rush at him while dodging his attacks and roll twice in the post where Zant stands to bring him down. Strike him with your sword again.
Fifth step: Snowpeak Ruins
Here, Zant is a giant. Use the Ball and Chain, look for his reflection in the floor and strike him as soon as he lands. Then Zant becomes tiny and you have to strike him with your sword quickly. Repeat this operation twice and the last part will begin.
Sixth step: In front of Hyrule Castle
Zant creates a magical barrier around the arena. He uses two swords, and it's important to let him finish his attack until you start yours. Just parry with the "Z" button. At the beginning you can hurt him easily, but after a few attacks, he will be more fast. When he spins randomly in the arena, get away from him: he is unvulnerable when spinning. When he pauses to take a breath, strike him with verticals strokes or even a Jump strike. His other attacks will simply push you in the barrier, so never stay near the arena's borders. Be patient and use the Hidden Skills to win the fight quickly.
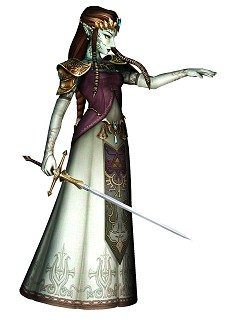 Ganondorf
Location: Hyrule Castle
Difficulty: 7/10
How to defeat him: In dueling, the Fishing Rod can distract!
Here again, only the last part of the fight is difficult if you don't know all the Hidden Skills. Ganondorf is not difficult but the fight can be long.
First step: Possessed Zelda
This fight is so nostalgic! Simply return the shots on Zelda with your sword three times. Be careful, the shots become faster and faster so stand far enough from Zelda. The princess also charges you sometimes, simply dodge her attack. She can create areas of effect on the floor too, just get out of the symbol on the floor to be safe.
Anthony's note: When Zelda prepares a shot, do a Jump Strike then a Spin just when she starts to throw a ball, she won't be able to return it.
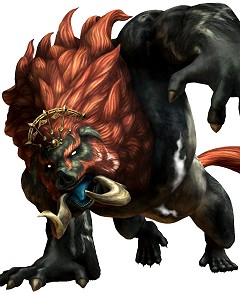 Second step: Dark Beast: Ganon
Ganondorf transforms into a giant boar, look quickly for the white shard on his head: that's his weakness. Shot it with your Bow and arrows before he charges you: he will fall. Now rush at him and strike the white mark on his belly. Repeat this operation to win the round. Then Ganon changes his technique and teleports when you shot him. Turn into a wolf and look at the portals to determine where he will appear. Stay put when he charges you and press "A" at the right time to grab him and bring him down. Switch back to your human form and strike his belly with your sword. Then switch back to Link wolf and repeat these actions. Be careful, Ganon becomes faster and faster, so do the same.
Third step: Ganondorf (Horseback)
This is the definition of an epic fight on horseback. You ride Epona and you must get close to Ganondorf so Zelda can shoot him with the light arrows, be closer for a better accuracy. Then strike him with a Spin attack if possible. Here again, Ganondorf is faster and faster. He has only two attacks: he can charge you to unseat you or shoot light balls turning into ghosts who unseat you as well. To avoid these ghosts, be sure to stay close to Ganondorf. After hitting him quite a few times, you will access the last part.
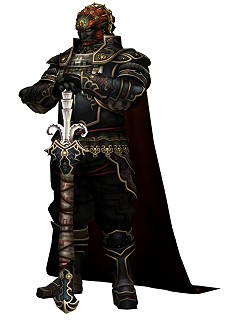 Fourth step: Dark Lord: Ganondorf
This last fight of the game is a duel between Link and Ganondorf. The latter gets an incredible defense and your mastery of the Hidden Skills will be crucial. It's possible to beat him without using Hidden Skills (except for the first one) as his assaults make him vulnerable but striking him only at these momements would be long and difficult. Z-target Ganondorf and try as many Shield Attacks and Back Slices as you can. You can also use Mortal Draw but only at the beginning.
When Ganondorf is stunned or takes a breath, try a Jump Strike. Get away from him and try to dodge when he jumps to attack you on your back. He's more vulnerable after this attack. If you are far enough, Ganondorf will charge you and the "Chance" button will appear. Press "A" at this very moment and a real duel will start between Ganondorf and you. Pound the "A" button to take the advantage: he will be stunned and you will be able to strike him. This last fight is like an endurance test. When Ganondorf is weakened, your next strike will make him fall briefly and he'll be vulnerable to End Blow. Quickly press "A" to defeat him definitively and watch the beautiful ending scene.
Notes :
Mash the A button to do a Mortal Draw leading to a close combat fight. Link and Ganondorf will then cross swords. You then have to press A as fast as you can and if you succeed, he will fall down. You have to do it 3 times. The third time he's down, you'll just have to land the final blow!
You can also turn around him, he will try to kick you. Take advantage of this moment to hit him.
And also: take out and throw your fishing rod, Ganondorf will be distracted for a few seconds, allowing you to quickly land some blows!
