
Skull Woods
 1st basement
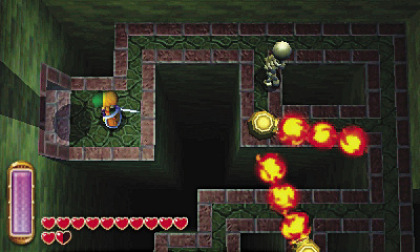
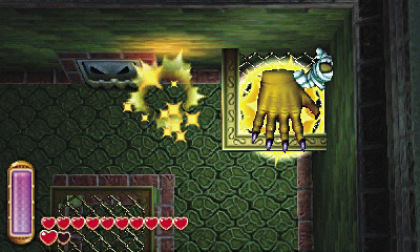
Watch out for the hand that tries to catch you, avoid it or strike it when it lands on the floor. Go east and take the first path north. Get rid of the mummy (which turns into a skeleton if it touches the fire), then open the chest which holds the Compass. Go back to the first room and go west. Follow the long hallway to the end and stand on the floor switch, which unseals a door.
Go back and walk through this door. Head south watching out for the flames, the skeletons and the hand! and go south outside.
Outside
Take the path to the right, go north and jump through the hole in the ground.
 1st basement
You land back in the room that you already visited. Walk onto the platform and, to avoid the hand, merge into the wall on the way, then come back on the platform and step off north. Open the chest to find a Small Key, then climb the steps down and take the path north. Light the brazier on the right, then follow the path to reach the southeast corner of the room. Unlock the door and go south to go outside again.
Outside
Go north and jump through the hole to return inside the dungeon.
 1st basement
Open the nearby chest to get 100 rupees! Drop yourself below, get rid of the skeleton, then take the path south. Cross the room towards southeast and go outside.
Outside
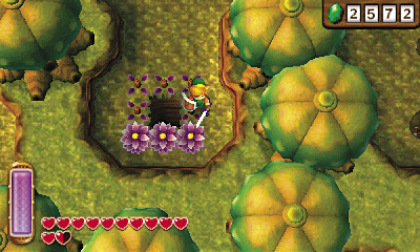
Go north again, then southwest and cut the bushes to reveal a hole. Jump through it.
1st basement
Go south and take the path west. Place a bomb on the cracked floor or attract the hand to this place so that it smashes the floor. Drop yourself through and stand on the switch to the south, which causes a wall to disappear on the left. Climb the steps up, go north and once again use a bomb or the hand to break the cracked floor. Jump through the hole and open the chest containing a Small Key. Stand on the switch, which makes a bridge appear, then go right to walk around the room and unlock the door to the southwest.
 Head right and pull the lever to create an access to the floor below. Drop down and walk down the stairs to the...
2nd basement
Merge into the wall on the right and go right, then go south. Get rid of the enemies, then grab and push the gargoyles to place them on the first two left pressure plates, which creates a solid wall across the room, from east to west. Climb the steps up on the left, turn into a painting and go to the far right. Pull the lever, which makes a staircase appear, then take the path east.
Stand on the floor switch to the south, which activates a platform, then merge into this platform and exit after crossing the pit. Head north and stand below the floor switch so that the hand smashes it! and activates the second platform. Merge into it and exit north. Stand on the floor switch to create a shortcut, then take the path north.
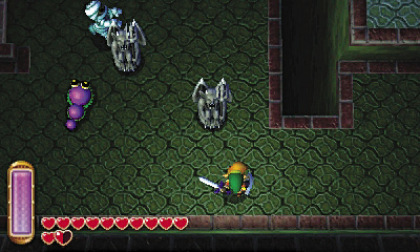
 Step on the switch to free the enemies from their cage, get rid of them, then stand under the two grid platforms to the north so that the hand smashes the two mummies. The next door is then unsealed and the warp portal appears. Continue north.
Walk onto the moving platform, then step off quickly towards the south door. Enter the cage on the left, then exit in front of the chest and open it to find a Small Key. Go back on the platform, exit left, then unlock the door. Climb the steps down, go to the far left and light the brazier to make two mummies suddenly appear. Defeat them and the door opens. Take this path to the northwest. Go on and walk up the stairs to the...
 1st basement
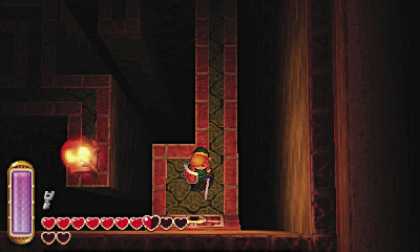
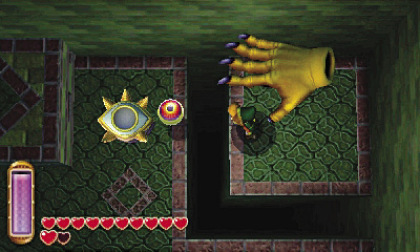
Merge into the wall on the left and go through the bars. Go to the far right, merge into the wall, go left and exit. Pick up the eyeball, throw it to the south, then cross the pit again. Pick up the eyeball again, then throw it in the right white container. A walkway and a big chest appear, but the latter is not reachable. Cross the walkway, use the moving platforms to head south, merge into the second wall to reach the other side, and look for the second eyeball. Turn into a painting to the south to go through the bars, then exit south.
Outside
Go west, open the chest to get 50 rupees, then go north, southeast, cut the bushes and drop down through the hole.
 1st basement
Merge into the south wall and cross right. Leave the eyeball where it is for now, merge again and exit in front of the high narrow wall. Open the big chest containing a Master Ore, then go back to the eyeball and throw it below. Drop down, pick it up again, then stand under the grid platforms to be protected from the hand. Continue north, then west, and then north again. Throw the eyeball on a moving platform, cross eastward by merging into the wall, then pick up the eyeball again, go north and throw it in the second container. Open the now reachable big chest to get the Big Key! Take the stairs again to the...
2nd basement
Go back south, then open the boss door.
Knucklemaster
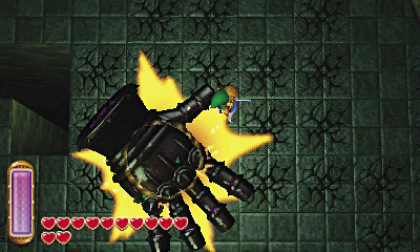 Go to the other side of the room where there are a few cracked tiles, then keep watch of this giant hand's movements. When it clenches into a fist, turn into a painting so that it hits the wall and gets stunned. Then exit quickly and slash its eye as many times as you can before it recovers. When the hand smashes the floor (and breaks some cracked tiles), turn into a painting to avoid it and watch your energy gauge to avoid having to exit at a bad time. Repeat this technique to finally be done with the boss.
Pick up the Heart Container, then take the northern path to go out. Touch Seres's portrait to be taken back in the Sages' room. She asks you to free the other Sages to gather theirs powers. Next, enter the portal to return to Lorule. Hilda tells you about the legends of Lorule and of a hero like you.