
Desert Palace
 1st floor
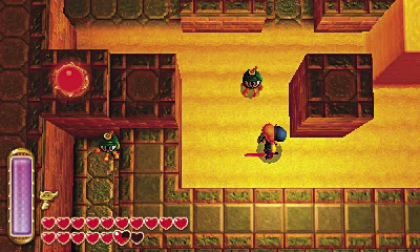
Use the Sand Rod to the north, cross the sand wall, then climb the steps down on the left. Use the Sand Rod on the sand to raise a wall, merge into this sand wall and walk towards the chest, which only holds 5 rupees... Use the rod northward again, merge in to go around and take the path north.
Get rid of the enemies, then climb the steps up on the right. Turn into a painting to sneak past the two "Beamos" and continue east.
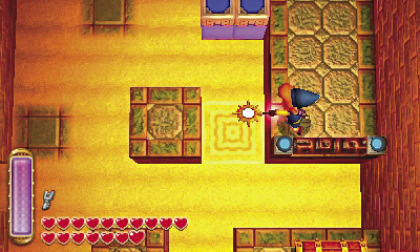
Head north, then use the Sand Rod to the right, cross the sand wall, then stop just before the steps to the north. Wave the Sand Rod to the left, walk and stand between the crystal switches and strike them quickly so that they are all activated at the same time, which makes a wall slide away to the south. Go southward and take the path south.
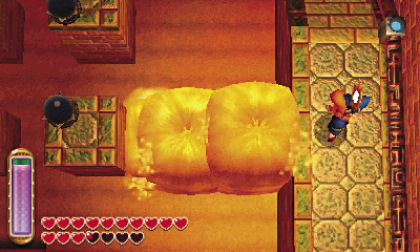
 Climb the steps up to the south, grab the gargoyle and put it on one of the three black tiles. Next, use the Sand Rod to the right where you can see another gargoyle and stand beside it. Use the Sand Rod again to the left and quickly grab the gargoyle and pull it on the sand wall. Then place it on another black tile. Jump towards the third gargoyle and pull it towards northeast so that it stands on the sand. Next, climb the steps up again and use the Sand Rod to get to the gargoyle and pull it to the left, on the third tile. The door opens. Take this path westward.
Walk on the floor switch to retract a wall (and create a shortcut), then wave the Sand Rod to the left, cross the sand wall and continue west. Walk on the sand to make an enemy appear and use the Sand Rod on it to make it pop out. Next, slash it several times to destroy each piece of its body. A chest falls to the south and a door unseals. Take the path northwest.
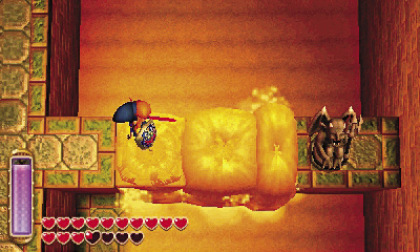
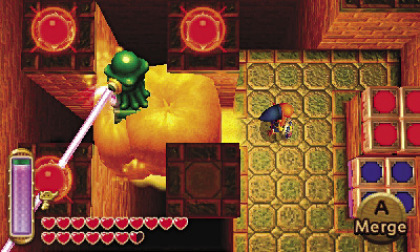
 Slash the small enemies and use the Sand Rod on the big one so he shows you its tail, which you must strike. Drop down, climb the steps up to the north and come back to the centre of the room. Wave the Sand Rod to the left and merge into the sand wall to reach the west side. Wave the rod to the south, merge into the sand wall and go left. Open the chest holding a monster tail, then go back north and take the path north.
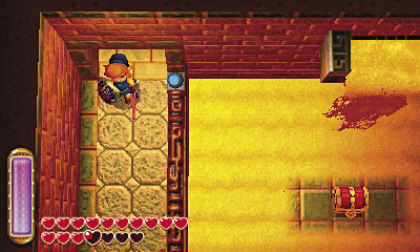
Pick up the blue rupees, open the chest containing the Compass, then pull the lever which causes sand to flow into a pipe. Go back south where the floor is now covered in sand. Drop on the sand and open the chest to the north to get a Small Key! Climb the steps up to the right and unlock the door.
 Pull the lever to the north, which fills the room with sand. Climb the steps up to the right, use the Sand Rod twice to the left, then once to the north to reach the platform with the switch. Step on it to make a wall slide away, then take a few steps to the left. Wave the rod to the left, merge into the sand wall, then into the brick wall to reach the northeast corner. Open the big chest to get the Titan's Mitt! Drop on the sand, climb the steps up on the left, go back west to the previous room, then to the one south.
Climb the steps up to the right, then wave the Sand Rod to the south, move on the sand wall, and pick up and throw one of the large rocks thanks to the Titan's Mitt. Open the chest to find a Small Key, then jump, lift the rock in front of the door, then unlock it. Smash the skulls to the north to recover a few hearts, then go out south. Enter the cave north.
 2nd floor
Smash the floor tiles thanks to the Shield, get rid of the two enemies, then a bridge and a warp portal appear. Keep going, climb the steps up, then use the Sand Rod and merge into the sand wall to climb the steps up on the left, and take the path on the left. Drop down, get rid of the enemies, particularly the gargoyle on the right, then move where this gargoyle was standing. Lift the rock further, then use the Sand Rod on the buried chest to bring it up to the surface. Open it to get 100 rupees! Then climb the steps up to the south, wave the Sand Rod to the north, move on the sand wall, then take the path east.
 Climb the steps down, walk carefully behind the Beamos, climb the next steps up and open the chest holding 100 rupees as well! Continue east, and exit the next room east.
Climb the steps down to the north, go to the far south of the room and stand on the red blocks to the southwest. Strike the crystal switch which raises the blocks, climb the steps up on the left, then wave the Sand Rod to the right and walk onto the central platform. Next, use the Sand Rod to the south and push the gargoyle into the pit. This way, the projectiles hit the switch directly. Drop down, walk on the lowered red blocks to the north, move on the blue blocks, then go right and take the path northeast.
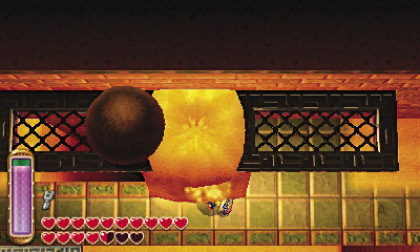 Climb the steps down, pick up the large rock on the right which hides a chest, use the Sand Rod to bring it up to the surface and open it for another silver rupee! Next, go left and climb the steps up. Place a bomb near the cracked blocks, then climb the next steps down. Go right, pick up and throw the large rock and go back left. When a ball comes near, use the Sand Rod to the north so that the ball rolls on the sand, go quickly to the right, use the rod again to the north, then stand under the grid platform and use the Sand Rod to the right, so that the ball rolls to the far right and smashes the cracked block, which lets sand flow down in the southern room. Take the path south (at the centre), pick up another rock which hides another chest, and use the rod to find 100 rupees inside, then turn around and take the path southeast again.
 Move on the blue blocks, use the Sand Rod to the south, merge into the sand wall, then go right and exit near the big chest. Open it to get the Big Key! Use the Sand Rod again to reach the southern platform and open the chest which holds a Small Key! Drop down and take the path south, where three small fairies can be found! Then go back north.
Go to the far north, climb the steps up on the left and go back west twice, then unlock the door. Climb the steps down to the south, then walk to and stand to the left of the Beamos. When it starts using its laser, use the Sand Rod towards it so that the laser activates the three switches, which opens the southern door. Take this path south. Defeat the four enemies, then the two worms thanks to the rod. Open the newly-appeared chest for an additional Small Key! Then go back in the previous room.
 Go north, then east and stand to the right of the second Beamos. Wave the Sand Rod when it fires its laser, stand quickly on the blue blocks, move onto the red ones, then when these are raised up, merge into the wall and go left. Unlock the next door and walk up the stairs to the...
3rd floor
Keep going and take the path west (under the sand). Open the chest to get 100 rupees, then go back east, take the path southward, and the next one.
Go right, wave the Sand Rod to the right, then walk quickly on the sand wall while getting rid of the three gargoyles and open the chest which holds a Small Key! If you're not quick enough, you just have to climb the steps up, come back in the previous room and return to this room. Drop down, climb the steps up and go back in the previous room. This time, go right and unlock the door.
 Strike the bomb-enemy in front of the cracked block to make it blow out, then pick up the green rupees if you wish. Stand in the northwest corner of the room, strike the bomb-enemy near the cracked block, then go left and pick up all the blue rupees, as well as the red one. Go back right, then use the bomb-enemies and the Sand Rod so that these bombs destroy the three cracked blocks above. In this way, the projectiles can reach the switch! Go back near the door, cross on the blue blocks, then the red ones, then left and take the path south.
Pull the lever so that the sand pours in this room, then drop down and open the boss door on the right. Stand at the centre, use the Sand Rod to the south, walk on the sand wall, lift the large rock, then use the rod again and take the path south. Break the pots to recover a few hearts, then enter the fissure.
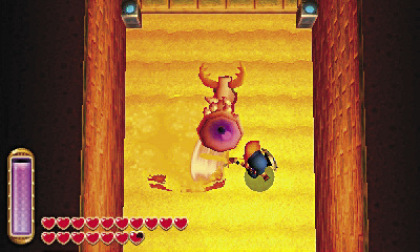
Zaganaga
 Drop down to make the boss appear...
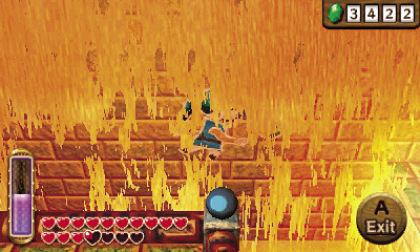
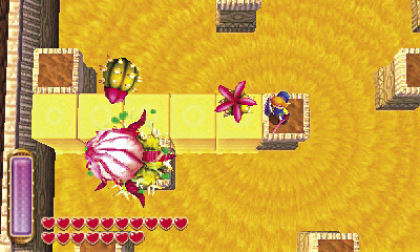
Use the Sand Rod to get near to this giant cactus-like monster and slash him as much as you can. After a few attacks, the plant launches small minions and sometimes blows sand in your direction. The best is to remain focused on the boss and continue using the rod to get near and strike him relentlessly with the sword. After repeated strikes, the boss is defeated and the shifting sands disappear to give way to normal sand.
Pick up the Heart Container to the north, then touch the painting on the wall. In the Sages' room, Irene says you could have been quicker (!) and urges you to save the other Sages! Enter the portal to return to Lorule near the swamps' weather vane.