
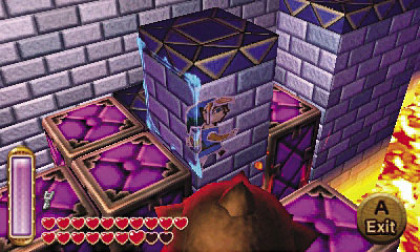
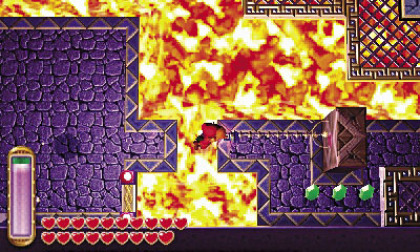
 Climb the steps up on the right, stand on the pressure plate to unseal the door and go on. Get rid of the enemy, then go right near the red rupee and see purple blocks pop up from the lava! Move on the block on the right, pick up the rupee, then continue on the blocks eastward and northward towards a platform with a gargoyle. Stand in front of the gargoyle and pull it southward as much as you can, which makes a large spiked ball roll, then move it to the right so that the ball hits another large balls and destroys it. Next, merge into a purple block on the right and go right until you see a doorway. Exit and take this path south.
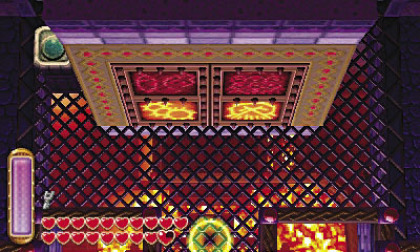
 The doors close! Stay near the entrance and raise your shield to smash all the tiles. Then a grid platform appears over the lava, as well as a staircase on the right. Walk up these stairs and go back to the previous room.
Move on the purple blocks, go right, then continue northward to the north wall. More large spiked balls roll on your left. Come back south at the same time as a ball, merge into the stone block, quickly go right, exit, merge again with the next stone block and continue right so that the ball rolls and hits another large ball. Next, go back north using the path used by the ball and open the chest which holds a Small Key! Go back south, go left towards the red rupee, then go north to another platform and unlock the door.
 2nd floor
Defeat the giant jellyfish, then the jellyfish babies when they are not electrified, then move to the warp tile to come back to the...
3rd floor
... And see the square corresponding to the Jellyfish room light up.
Walk upstairs back to the...
 4th floor
Stand on the pressure plate between the two "lamp pillars". Go on, climb the steps up in front of you, stand just south of the brazier and put it out with the sword. Then a gate of some kind moves to the south and another one to the north. Locate the now-visible path on the left, choose the Lamp in your equipment, light this brazier, then go left up to the leftmost pillar, then go north between the left pillar and the middle one up to another brazier. Put it out to see where the path leads on the right, then light it again and take this path up to a third brazier.
 Again, put it out to locate the rest of the path west and north, then light it anew, and continue left, then north up to the chest. Open it to find a Small Key, then walk back to the third brazier, go north and get rid of the enemy. Step on the warp tile to find yourself back in the southwest corner of the room, then activate the switch so that a platform-shortcut appears near the entrance. Step on the other warp tile to come back near the locked door and open it.
5th floor
The door closes and another ball and chain soldier gets closer. Defeat it like the previous one, then the door reopens and a warp tile activates. Recover a few hearts from the walls if you wish, then step on the tile to go back to the...
3rd floor
... And see the square corresponding to the ball and chain soldier room light up. Walk up to the...
4th floor
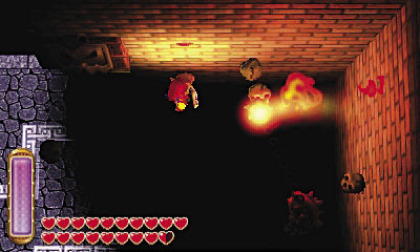
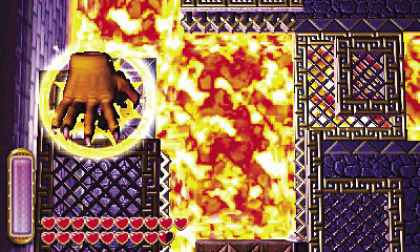
 Go to the far right, stand in front of the lever, then use the Hookshot on it and pull it out from the wall, so that the door unseals. Go on. Get rid of the enemy while watching out for the hand and take the 50 rupees it may leave behind. Use the Hookshot on the right wall to cross the lava, then continue right and walk on the grid platforms to cross northward. Defeat another enemy, open the chest to the north containing 50 rupees, then notice the lever on the left. Stand to the south of this lever and use the Hookshot to pull it, which modifies the way one of the grid platforms moves. Walk onto this grid platform, then step off to the north. Get on the raft to the north, then use the Hookshot on the walls to move left, then north, then right. Wait for the hand to press the floor switch on the metal grid above you (which lowers a wall), then move on thanks to the Hookshot towards north, right and north. After the hand has crashed on the metal grid above you, continue left, north, left and step off south.
 Get rid of the enemy and smash the skulls to reveal some floor switches. Next, move the gargoyle on the left floor switch, then stand on the middle one and when the hand is about to catch you, quickly move to the right switch so that the three switches are pressed at the same time! Another part of the wall lowers. Go on, stand under the cracked wall on which an eyeball lies, then when the hand presses this wall, pick up the eyeball and throw it on the raft. Strike the hand, then get on the raft and come back where it first was. Carry the eyeball and throw it on one of the two containers. Go left, merge into the wall, go left, then stand under the eyeball and wait for the hand to press the cracked wall. Pick up the eyeball and throw it against the left wall in such a way that it stays near the left wall and to the north of this platform. Merge again, go right, then stand opposite to the eyeball but not too close to the lava. Use the Hookshot on the eyeball to bring it to you, then throw it on the second container, which makes a chest fall. Open it to find a Small Key! then unlock the nearby door.
5th floor
Another Argghus! Defeat him like the previous one in the Swamp Palace, then step on the warp tile to come back to the...
 3rd floor
... and see the square corresponding to the Argghus room light up.
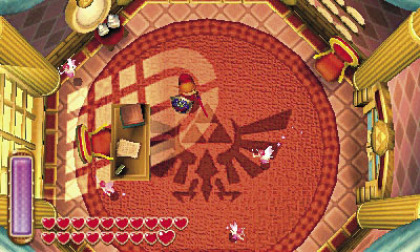
When the four squares are activated, the mural opens. Go in and find yourself in the castle's office. Enter the fissure to the north to return to Hyrule. Put a few fairies in your bottles, then use the fissure again to come back to Lorule. Go out through the right doorway and head right to arrive to the throne room.