
Tower of Hera
 1st floor
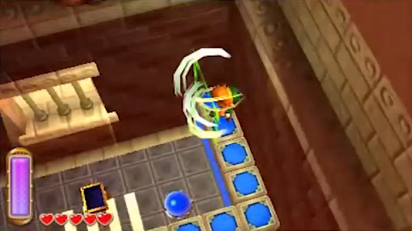
Go on, press the smiling buttons with the Hammer, then strike the crystal switch to lower the blue blocks (and rise the red ones). Strike the red switch on the right or on the left to lower the red blocks, then get rid of the enemies using the Tornado Rod to turn them over and then slash them. Hit some buttons to recover a few hearts in the pots, then go to the northwest corner, hit a smiling button, step on it and you are then ejected on a higher platform. Turn into a painting, go left and exit further. Go south, merge into the wall to the south, then move left to pass over the doorway and avoid the two spiked balls. Go north, strike a button and step on it to bounce higher, then press the large button and step on it to reach the...
2nd floor
Beware the enemies which make you bump backwards each time you strike them with the sword. Drop through the hole at the centre to land on the first floor's central platform. Open the chest nearby to claim the Compass, then pound down the button to fly back to the second floor. Now pound down the big button on the left and step on it to reach the...
 3rd floor
Turn into a painting against the upper blue wall, go left, then exit and hit the blue crystal switch. Go right, hit the red switch, then go south and stand on the red lowered blocks. While staying there, hit the blue switch on the left, which makes you go up one level. Move north and pick up the Small Key. Jump on the right, climb the steps up and unlock the door to the east.
Outside, go onto the moving platform, get rid of the ravens, then when the platform touches a wall in front of you, turn quickly into a painting, go around this wall and exit on the platform. Get off where there are two small hearts, then merge again with the wall, go right to the platform-lift, then emerge at the very top near the doorway, and go inside.
4th floor
Go north, hit the blue crystal switch, then strike the big button and step on it to reach the...
 5th floor
Strike the red switch, then move on the lowered blocks and strike this switch again. Drop down to the right, open the chest which holds 5 rupees, then move on the blue lowered blocks and hit the switch down. Go on the blue blocks northward or southward, turn into a painting, head to the window, go through and exit outside.
Go on the moving platform, watch out for the spiked balls then turn into a painting to go round the wall in front of you, just like you did before. To the west, merge again with the wall and go right to pick up the heart. Merge again, go left to go round the wall and emerge where some green rupees are. Go back south, merge into the wall, move onto the platform-lift on the right, go up with it, and get off on the higher platform.
 6th floor
Go through the doorway. Fight all the skeletons, then a warp portal and a platform-lift appear. Move onto this lift to reach the...
7th floor
Get rid of the enemies, strike the blue crystal switch and go north. Stand on the cracked floor tiles and pound them down with the Hammer to fall back on the 6th floor. Open the chest holding some monster guts, then hit the smiling button and step on it to go back on the upper floor. Strike the red switch, go west, strike the blue switch and go west again. Once more, pound down the cracked floor to fall to the 6th floor, pick up the Small Key then go back to the 7th floor thanks to the button. Open the locked door to the south and go out.
 Outside, go onto the moving platform to the south, then, when it heads to the right, strike the button to reach the platform on the 9th floor! Move onto the next platform, let yourself be driven to the far east, then drop to the platform with a chest. Open it to get 100 rupees, break the pot which hides an energy potion, then turn into a painting and go back to the far west. Use the platform again to return to the...
 9th floor
Move onto the next platform, pound down the button quickly and step on it to bounce higher. Take the path leading inside. Move a little, then raise your shield so that the floor tiles come crashing on it. Drop through the hole under the platform-lift, refill your hearts by touching a small fairy (or capture one in a Bottle) and open the chest to get 50 rupees. Step on the warp tile northeast to go back to the 9th floor, then go onto the platform to reach the...
10th floor
Watch out for the enemies which can make you fall to the 9th floor and strike the four crystal switches to activate another platform. Go on it and hit the button to fly to the...
 11th floor
Move onto the platform to the right, then, when it heads right, pound down the button to land near the big chest. Open it to get the Big Key, then jump on the previous platform. Strike the left button to land this time near the boss door. Unlock this door to go back outside, hit a small button, then the large one to reach the...
12th floor
Refill your hearts, then go on one of the big buttons to finally meet the boss on the 13th floor...
Moldorm
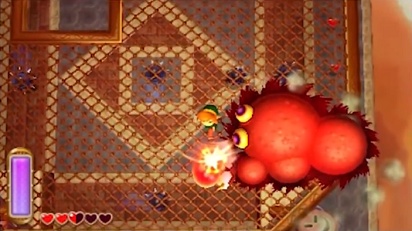 The technique is simple: You have to slash the tip of its red tail 6 times. After the 3 first hits, the boss moves faster and things get more complicated! (If you have trouble with this, you can buy a Red Potion in the Old Witch's house.) (You can also fall from the platform purposely and recover some hearts on walls.) After having defeated him, take the Heart Container, then the Pendant of Power to the north.
*** If you die in the palace, start the game in your house and talk to Ravio to get the Tornado Rod and the Hammer back. Go back into the dungeon and enter the warp portal to return to the 6th floor.
You are back in front of the tower and hear the voice of Sahasrahla who informs you that you have gathered the three Pendants of Virtue. He also says that you should now be able to get the Master Sword deep within the Lost Woods.