Eagle's Tower
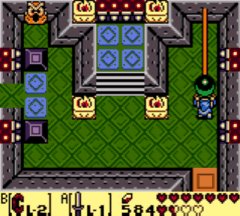 Go right twice, get rid of the two enemies, pick up the Small Key and unlock the door nearby. Go up, take the stairs, then go up. Pick up the ball on the pedestal, then while holding the button assigned to the Power Bracelet down, pull the lever as much as you can, then quickly go left. (You can also put the ball in front of the blocks and take it on your way, but it's harder.) On Switch: Lift the ball, place it in front of the blocks to the left, pull the lever as much as you can, then quickly go left, grab the ball and go left.
On this floor, there are four pillars that you have to destroy. If the ball falls into a hole, it will spawn again on the pedestal. On Switch, the ball is visible on the map.
Throw the ball on the first pillar (and leave it here), then go up, lift and toss the two horses to make them stand up and pick up the Map in the chest. Go back down, pick up the ball again, stand in front of the door to the right and throw the ball to the other side of the fence towards the bottom. Then stand to the right of the blocks' row and do a diagonal jump towards the ball, then pick it up, go down, throw it towards the bottom, go through the gap, pick it up and throw it at the second pillar.
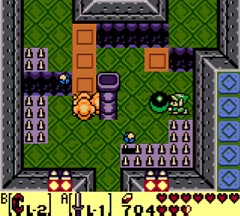 If you want to get the Stone Beak (which is quite hard to find in this temple): jump into the hole to the left, climb the stairs, go up, jump on the lifted blue blocks, go left twice, down, pick up the Stone Beak in the chest, go right, use the Hookshot on the pot, go right, climb the stairs, go up, jump to the right, go right, hit the crystal with the Hookshot, stand on the lowered block left of the crystal, hit the crystal again, go left, down twice, right, down, go through the door again, take back the stairs and go back where you left your ball.
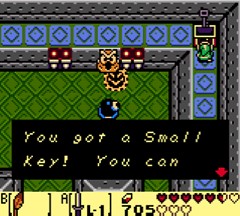 Take your ball again, go down, throw it behind the fence and hit the crystal. Go back up, to the top left, move the block, go left, up and hit the three cards so they all look the same. (If you stop them on the "heart" side, you will get three small hearts!). Pick up the Compass in the chest and take the stairs.
Go left (up), down twice, take the stairs and go down. Fight off Hinox with your Hookshot (on GameBoy) or the Bow (on Switch) (or the Boomerang) without falling down if possible and pick up the Small Key. (If you fell, just go up and take the stairs back up.)
If you need a Secret Seashell, jump into one of the holes to the left, stay on the ledge and keep going up. Pick up the Seashell in the chest, then jump down, go down twice, take the stairs and go down where the Hinox was.
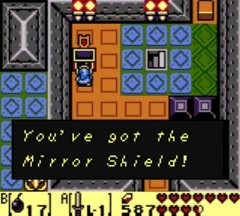 Go right. Again, hit the cards so they look the same and a chest will appear (be careful, if you die or fall down to the second floor, you will have to make the chest appear again). Go on to the right (the ball is there), hit the crystal with an arrow (or the Boomerang) and go right. Unlock the block, climb the stairs and go left (on Switch, there's no need to go left). Throw a bomb at the crystal, then go back to the right (not necessary on Switch) and go up. Jump towards the chest and pick up the Mirror Shield. Get back where you left your ball (without hitting the crystal), pick it up and go left.
Throw the ball over the gap, then go on to the left and up twice (left). Go to a corner of the room and destroy the flying slabs (be careful, the enemies can make you fall! If it happens, go right to climb the stairs and get back here). Go right. Blow up the bottom wall between the lamps, go down, blow up the other side, go ahead and shoot the Hookshot at the chest (holding a bomb) to go through the gap. Pick up the ball, go up and throw it at the third pillar. Only one left! Pick up the ball, go down, throw it back to the other side, then jump into the hole. You end up at the entrance.
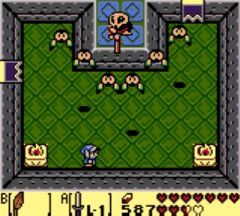 Go left, up and climb the stairs. Go down, right and lift the ball.
On GameBoy: Come back to the left and up twice. Quickly drop the ball in a corner, but not on a slab!, get rid of the flying slabs, pick up the ball and go right.
On Switch (as it's not possible anymore to go through the one-way door with the ball): Come back right, throw the ball near the crystal and hit the crystal. Go right, climb the steps, go up, jump left, go down, hit the crystal, take the ball back, come back up, push the block and go left with the ball. Go up, left, down, and throw the ball downwards. Go back up, take the stairs down, go left twice, down three times, take the stairs, go through the left door again, go right and lift the ball once more!
Finally, throw the ball at the fourth and last pillar!!! Jump into the hole to the left, walk on the lifted blocks and go right, down, then go right, down, go back through the door, then climb the stairs. Stand on the lifted block in front of the crystal, then hit the crystal with the Hookshot. Go down, left and climb the stairs leading to the third floor.
Go up, then right. To defeat Grim Creeper, you have to get rid of the six Keese before they vanish. Knowing that they will hit you in their order of appearance, be careful, stand in one corner of the room and be ready to strike them in this order. After the warping point has appeared, go up, push the two blocks towards the centre and pick up the Nightmare's Key in the chest. Go back down, left twice and unlock the Nightmare's lair.
If you want a Secret Medicine, go up twice, right and make the two horses stand, pick up the Medicine in the chest and come back here. (Rather not recommended on Switch and without interest if you already have one!)
Go through the Nightmare's door, climb the stairs, fire the Hookshot at the block to go across to the right, then go down, right and climb the stairs.
Evil Eagle
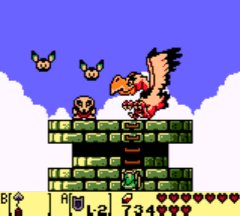 Climb the tower's ladder to meet Evil Eagle. To defeat it, stay in the middle to avoid falling down and use the Hookshot to hit its head when it's flying over you or at the same level (not sure it works on Switch). You can also strike it when it's within your reach. When it's blowing feathers, use your shield to block its attack and avoid falling down. If you ever fall down, you'll have to start the fight all over again (not true on Switch). After picking up another Heart Container, go down the ladder and get back inside. Jump to the right and go up to pick up the Organ of Evening Calm.
FYI: There are a few rooms that we didn't visit since there is no interest to do so.
Upon getting out, jump from the right ledge, go right, get into the cave and go back to the long stairs. Climb them, go left twice, climb the stairs and pay a visit to the Hen House (just for fun!). Then, go left, go across the bridge using the Hookshot, go left and you will meet Marin. Use your Hookshot to get to her, then after the owl has left, go on to the left. Cut the bush, take the stairs, go through the cave towards left (with the Hookshot) and get out.
Western Tal Tal Mountains
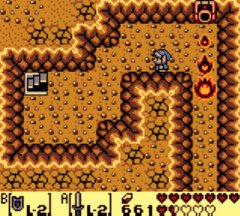 Upon getting out, you end up in Western Tal Tal Mountains. Quickly go left while trying to avoid the rocks, climb the stairs, go right and up. Go left, pick up 50 rupees in the chest, then take the stairs under the rock. Throw some Magic Powder into the well and the creature will either double your bomb, arrow or Magic Powder capacity (the choice is up to you).
Get out, go left, jump and blow up the cracked wall. Get into the cave, use the Mirror Shield to protect yourself from the flames and go forward, then take the stairs to the left. Outside, go left, down and left twice. Play the Frog's Song of Soul in front of the turtle to bring it back to life. Attack its head with your sword (on Switch: first with bombs then with your sword) when it's stunned, then get into the...
